Map
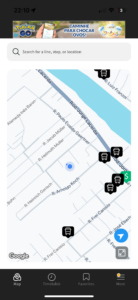
The app’s home screen displays on the map the location of nearby bus stops based on where you are – to enable this, make sure to allow the app to access your device’s location when it opens.
You can use the “center on my location” feature to view nearby stops, and the “expand map” option to see routes or plan your trip by tapping points of interest on the map.
The app’s main menu is located at the bottom of the screen and includes four options: “Map”, “Schedules,” “Favorites,” and “More.”
Live Map
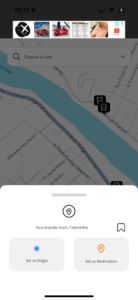
When you expand the map, you can explore the area interactively to plan your trip, search for available routes, and view their details directly on the map.
You can also freely navigate the map and, by pressing and holding any location for 2 seconds, the app allows you to select that spot as a starting point or destination to plan your route.
Additionally, you can favorite specific points on the map and assign them in the Favorites menu as “Home,” “Work,” or any place of interest. These will then appear directly on the map in future searches, making trip planning even easier.
Search
From the Map screen of the app, you can quickly search for a bus stop, line information, or even start planning a trip.
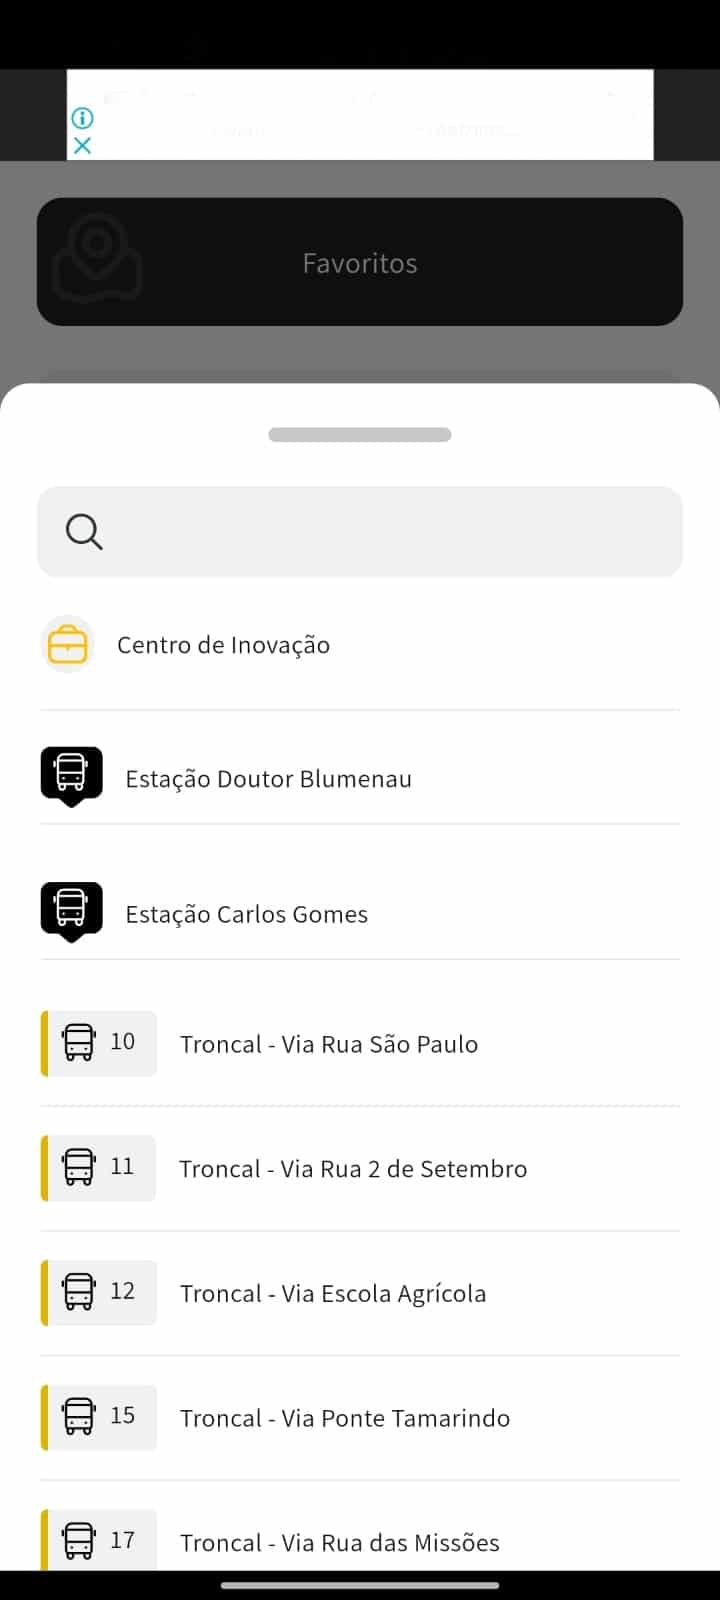
When you tap the text “Search for a line, stop, or location,” your saved Favorites and the list of available lines will be displayed.
Start typing part of a location name, and the results will update within seconds. If you select a bus stop, the arrival predictions for that stop will be shown. If you select a line, you’ll be able to choose a departure location and view the route and vehicles in real time, when available.
To plan a trip, simply select one of the displayed locations – it will be set as your destination. Then, you’ll be able to choose your starting point. The selected locations will be saved for your future searches.
Trip Planner
The trip planner can be accessed mainly from the Map screen, through the search field options, or from a bus stop or credit sales point via the More menu.
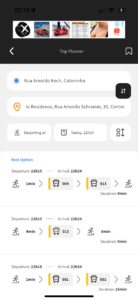
You can switch the origin and destination locations, choose whether to plan your trip based on departure or arrival at a specific date and time, and set how much walking you’re willing to do during the journey. In the results, you’ll see the distance, estimated travel time, and the recommended time to start your trip. By tapping on one of the options, you’ll see detailed information about that route.
Any combination of origin and destination can be saved as a favorite by tapping the upper left corner. It will then be available in Favorites, allowing you to access it without repeating the search process.
Planned Trip
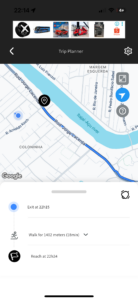
Once the route is selected, the app displays a detailed overview of the journey.
On the map, you’ll see your departure and destination points, as well as transfer points between different lines.
Below the map, there is a step-by-step summary of the trip, showing what time you should arrive at each stop, when your transport is expected to arrive, and even which vehicle to board—if real-time information is available in your city.
Schedules
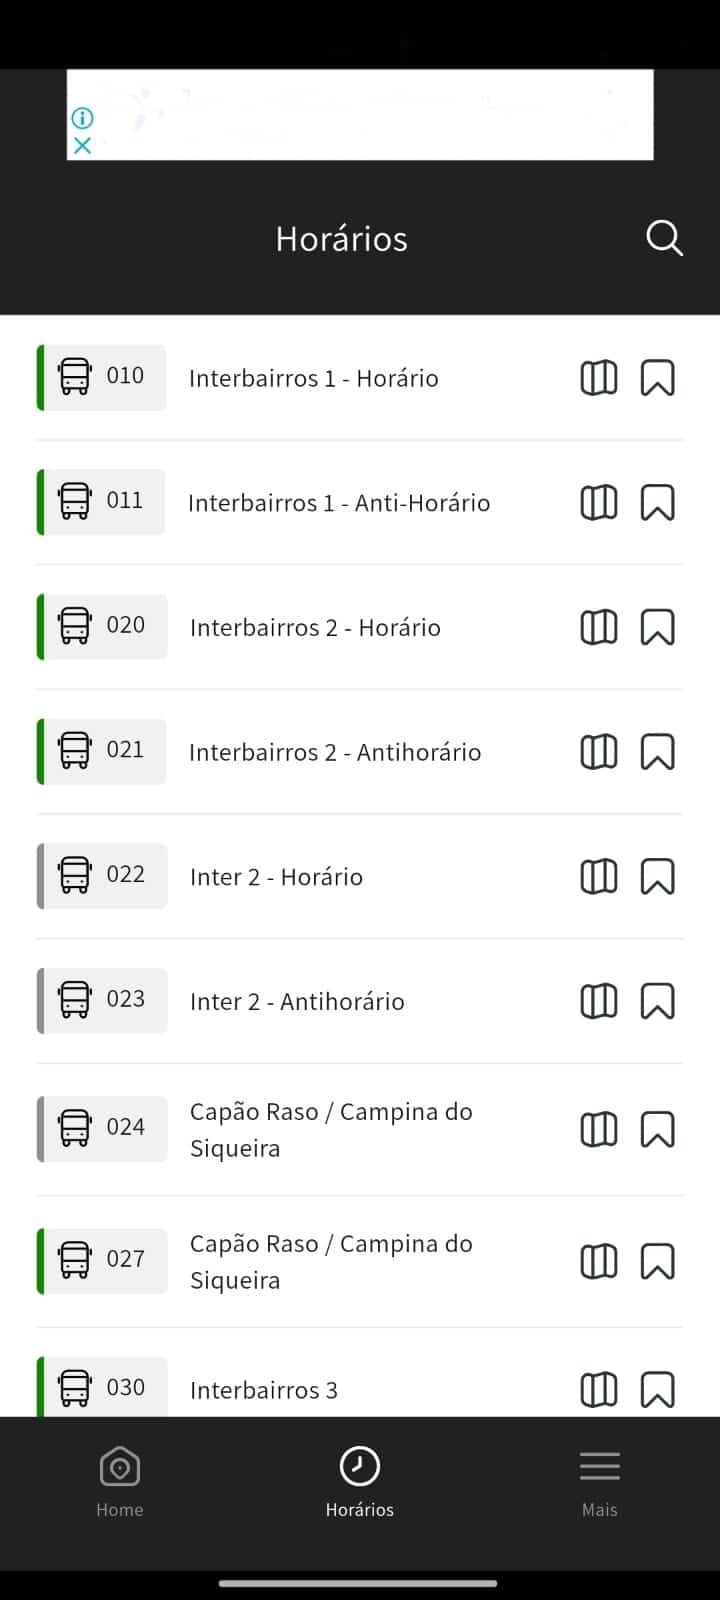
When you select the Schedules menu, you’ll see a list of public transportation lines operating in your city. Each mode of transport is identified by an icon — such as bus, train, subway, light rail (VLT), ferry, monorail, or trolleybus. The colors and codes next to the icons represent how each line is identified within your city’s transport system.
From this screen, you can select the lines you use most often to access them later in the Favorites menu. You can also open the Trip Map and view any alerts linked to specific lines, when available.
Timetable
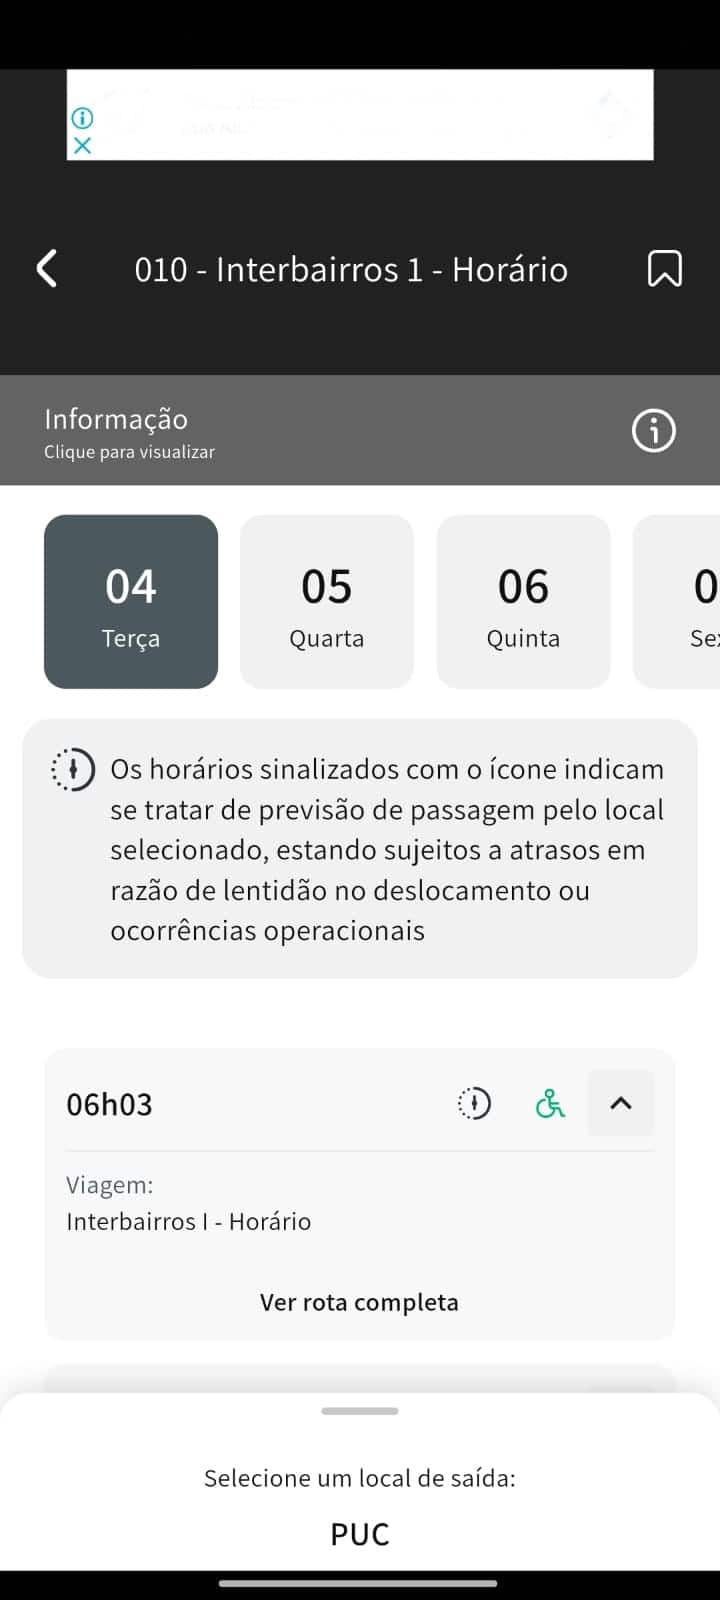
By selecting a line, you will have access to its schedule. After choosing the departure location, you’ll see all available times for today. Clicking on a time shows the trip’s destination and allows you to access the trip map.
If the indicated time is an estimated passing time at a specific point along the route, an icon and a notice will indicate this. Some lines may also have additional information — a gray or yellow bar will appear if there is an alert linked to the line.
This feature can be used even without an internet connection, as long as you have selected one or more lines as favorites. For other features, an internet connection is required to access real-time information.
Route Map
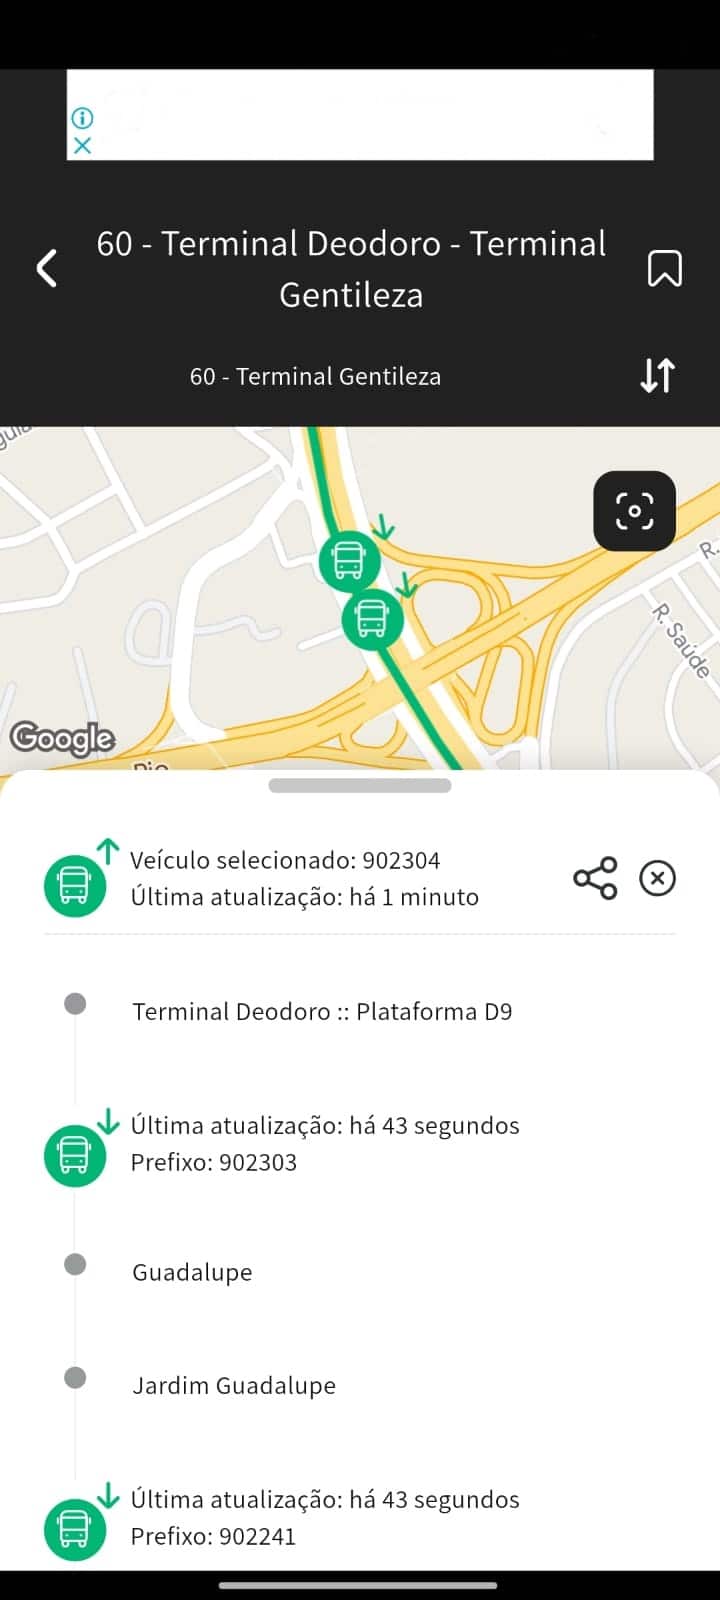
The trip map can be viewed in two ways: by selecting a specific time from the schedule, or by selecting the trip from a bus stop. In this view, the user will see the route path, the stops along the way, and, if available, the real-time location of the vehicles on this trip.
By clicking on a vehicle, you’ll see its identifier, the last communication it had with our systems, and you can share the vehicle’s location with someone else — you can send this link via instant messaging apps or view it in a browser.
Clicking on a stop in the list will show its location on the map and the next expected arrival time at that specific stop. If there are no more times available for today, the schedule for the following day will be displayed.
Stops
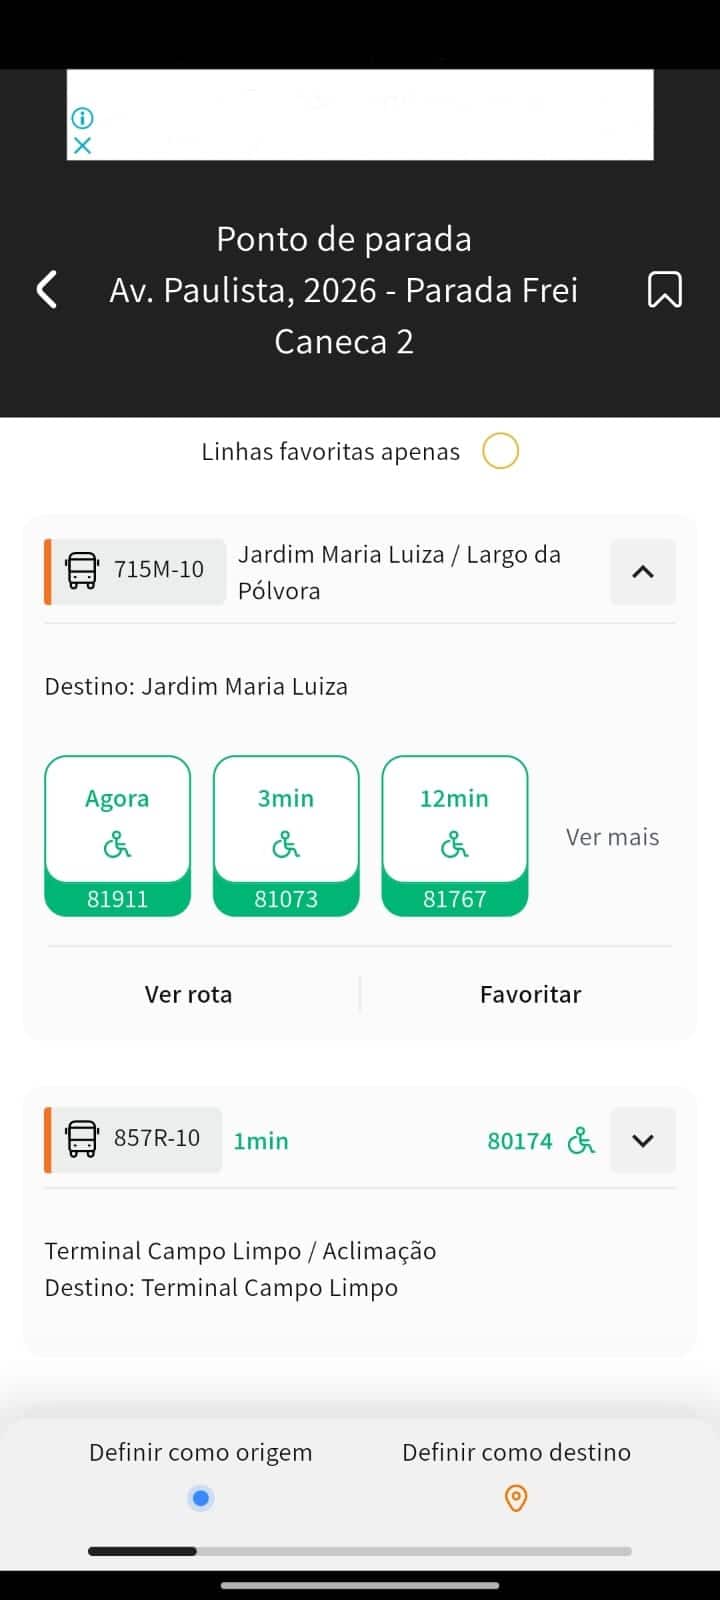
From the Map menu or Favorites, when you tap on a bus stop, the codes and lines that serve that stop will be displayed, along with their destinations and arrival predictions. If one or more vehicles are en route, their identifiers will be highlighted in green with the real-time countdown until arrival. Accessibility information, air conditioning, and bicycle transport details may also be shown if available.
The next three arrival predictions are displayed, and if you want to see the full schedule for that stop, select See More. By tapping View Route, you’ll see the trip details, stops along the route, and, if available, the real-time location of the vehicles.
In the upper left corner of the screen, you can mark this stop as a favorite. At the bottom, there are options to set the stop as the origin or destination in the trip planner. To view only your favorite lines, select the option just below the stop’s name.
Favorites
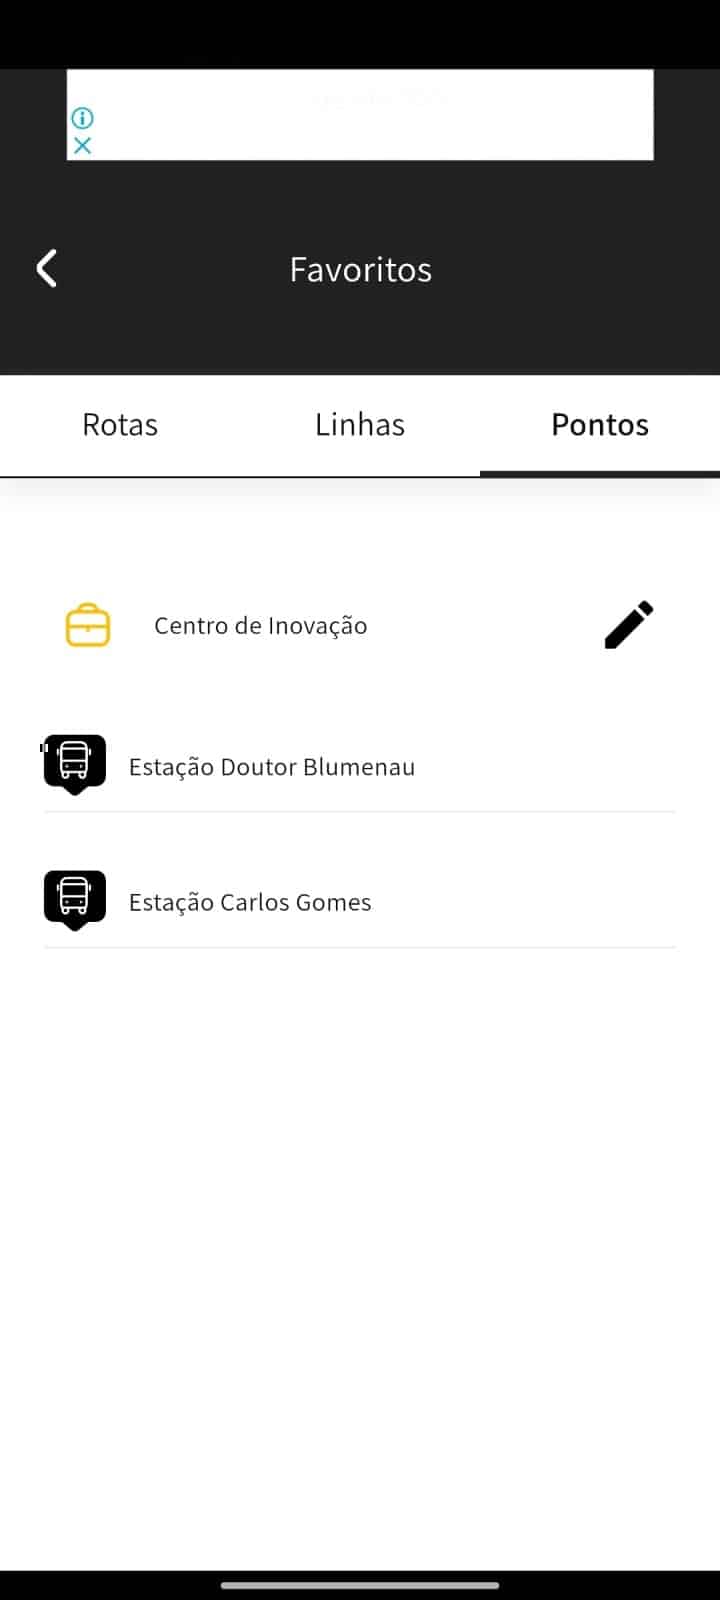
In the app’s main menu, you have quick access to all the information that matters to you — your favorite lines, bus stops near your home, work, or school, trips you take frequently, and even your saved addresses.
In Routes, the app shows the travel options you want.
In Lines, you can check the schedule even without internet access.
In Stops, besides quickly accessing predictions for your favorite stops, you can also rename any saved addresses—like your home, work, or school—as you prefer.
More
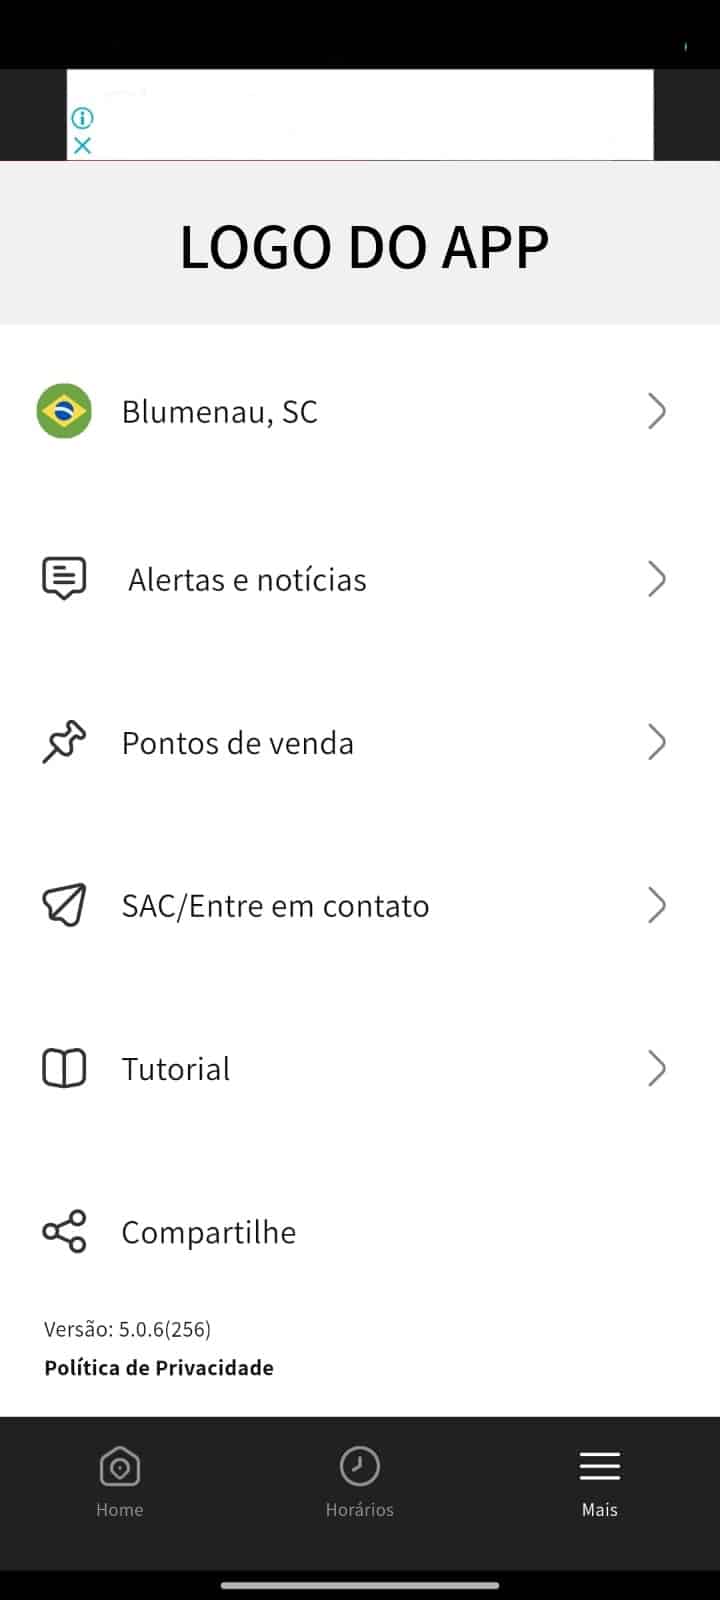
From the app’s main menu, you can access More, where features that bring the transport operator and their customers closer are available.
In Alerts and News, you’ll find information about situations that affect the normal operation of public transport or that may be of interest to all system users.
In Sales Points, you can locate credit recharge points on the map and in a list, and even plan a trip to these locations.
In Customer Service / Contact Us, you can send suggestions, complaints, or ask questions to the app administrators.
In some apps, it is possible to switch between different available cities by clicking on the city name next to the flag. The Sales Points and Customer Service / Contact Us options may not be available in all apps.
Settings
From the app’s More menu, you can access Settings, where features are available that allow you to adjust the app’s operation according to your preferences.
In App Permissions, you can review and manage which permissions have been granted, such as access to location, notifications, and other important features necessary for the app to function fully. For the app and its features to work properly, it is important to allow access to all requested permissions.
In the Customization option, you can configure the shortcuts on the bottom bar, choosing which functions you want to keep visible to make it easier to access the features you use most.